Getting Started
The fact that you're reading this means Spruce is already running, so it's likely the initial startup sequence already has fired up. Spruce looks for a directory called .spruce in your home directory. If it doesn't find it, it automatically opens the Spruce Configuration Options window. If you need to open it yourself, use Settings->Preferences on the menu bar.
Initial configuration
For its initial configuration, Spruce needs a few basic pieces of information. You can ignore most of the tabs in this window for now. But you've got to tell Spruce your identity, and which accounts you want to use for your incoming mail.
Identity
Spruce needs to know who you are. At this point, you should be in the Identity pane of the Spruce Configuration Options window.
Name — Add your name here. This will be used to fill in the return address on your mail.
Email Address: and Reply-To Address: — these are the addresses Spruce uses for your sending address and, if it's different, the return address you'd like folks to use.
Signature File: — If you want a signature file added to each message as it's created, put the file name here. The Browse button allows you to browse your file system to find a file.
Use Signature file/Use Random Signature — Check the Use Signature file radio button to use the file you've just chosen. Or if you'd like to use Spruce's clever random sig file widget instead, just check Use Random signature and good luck!
Accounts
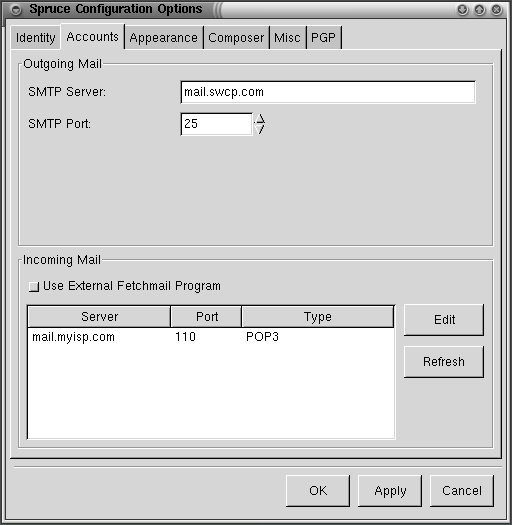
The Accounts tab in the Spruce Configuration Options window is used to tell Spruce which mail server or servers you use, both to send and receive mail.
Outgoing Mail tells Spruce which computer sends your mail to the rest of the world. Where it says SMTP Server, you're going to want to put the name of the machine you want to use, i.e. mail.myisp.com. For SMTP Port: you should probably leave the setting at 25, the standard port for a mail server, unless your Internet Service Provider tells you otherwise.
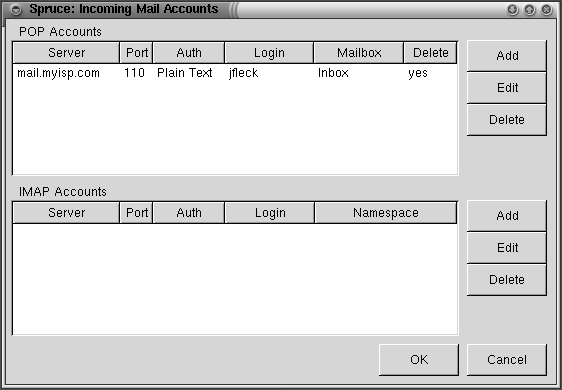
You'll also need to tell Spruce the machine to check for your incoming mail. To set up up the first incoming mail account, click on the edit button to pop up the Spruce Incoming Mail Accounts window.
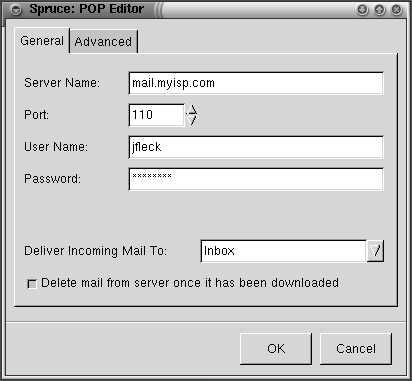
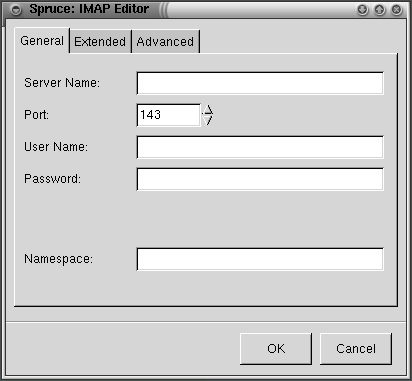
To add an account, click on the Add button adjacent to either the Pop Accounts or IMAP Accounts window pane, depending on which type of email account you have.
Type the name of the mail server that collects your mail under "Server": mail.myisp.com or some such thing. If you don't know which port to use, chances are it's 110 for POP or 143 for IMAP, so don't change that. For a POP server, you choose the Spruce mailbox you'd like the mail delivered to. Inbox is the default. Add your login name and password in those blanks, and check the delete mail box if you want the mail deleted from your incoming mail server once Spruce has loaded copies onto your local box.
Once you've filled in all the information, click on OK and your information will appear in the Incoming Mail Accounts window. Click on OK in that window and you're good to go.


